 Save
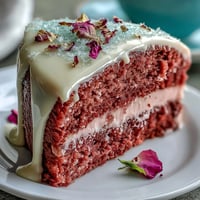
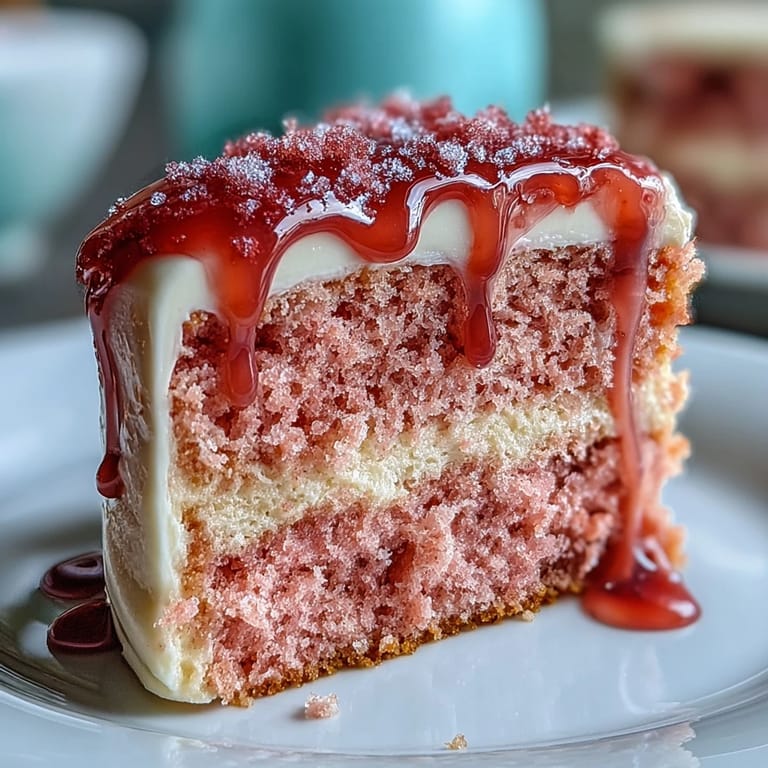
Save When the kitchen was filled with the scent of freshly baked cake and a gentle background of laughter from the other room I knew the Bridal Shower Rosé Velvet Cake was destined to become a celebration tradition. The first time I tried infusing rosé into a velvet cake batter it was purely for the whimsy of the blush-pink color but the nuanced flavor instantly set it apart from all the desserts I'd made before. There was a bit of mischief in sneaking tastes of the frosting before stacking the layers, each swipe blooming with a subtle floral note. What made this cake memorable though was the anticipation — waiting for guests to see that gold drip gleam in the afternoon light. Baking this feels like orchestrating a little kitchen magic, and the finished cake always draws a collective wow before the first slice is ever served.
I once baked this for a close friend's bridal shower on a drizzly spring day, and we wound up layering the cake while sharing stories and sipping rosé right from the bottle. Someone dropped a berry on the kitchen floor and the laughter that followed became just as much a part of the cake as its gold crown. Friends circled the table, each eager to snag a corner with the most shimmer while the bride-to-be couldn't stop smiling as she made her wish before the first cut.
Ingredients
- All-purpose flour: Sifting it helps keep the crumb light and even, so don’t skip that step especially for a tender cake.
- Granulated sugar: Creaming with butter until fluffy is the foundation for a delicate, moist texture.
- Baking soda & baking powder: The duo ensures lift, but measure with care so the cake doesn’t overspill your pans.
- Unsweetened cocoa powder: Deepens the flavor without overpowering, and the subtle chocolate note pairs perfectly with the rosé.
- Unsalted butter: Room temperature butter blends best—if it's too cold, creaming takes forever (I once learned that the hard way on a winter morning!).
- Buttermilk: Its acidity makes the crumb extra tender and balances sweetness—let it come to room temperature for a smooth batter.
- Rosé wine: Use a fruity, dry rosé for the best blush color and flavor, but avoid anything too sweet.
- Eggs: Bring them to room temperature; cold eggs can cause the batter to seize and bake unevenly.
- Vanilla extract: True vanilla shines through in both the cake and frosting, so use a generous splash.
- White vinegar: Reacts with the cocoa and leaveners to create that classic velvet texture—don’t worry, you won’t taste it.
- Pink food coloring gel: A little goes a long way; add it slowly and mix gently to achieve a soft blush.
- Cream cheese: The secret to a tangy, rich frosting that’s not overly sweet or heavy.
- Powdered sugar: Sift before using to prevent lumpy frosting and keep everything silky smooth.
- Heavy cream: Used for the drip, it’s what keeps the white chocolate fluid but not runny.
- White chocolate chips: Choose good quality so your drip tastes as luxurious as it looks.
- Edible gold luster dust: Turning it into paint for the drip gives that jaw-dropping shine – practice a gentle stroke for the best effect.
- Vodka or clear extract: These help the gold dust turn into edible paint; vodka evaporates quickly and doesn’t affect the flavor.
Tired of Takeout? 🥡
Get 10 meals you can make faster than delivery arrives. Seriously.
One email. No spam. Unsubscribe anytime.
Instructions
- Prep Your Pans:
- Grease three 8-inch cake pans, line them with parchment, and dust with flour—your future self will thank you when the cakes release without drama.
- Sift the Dry Stuff:
- Whisk flour, cocoa, baking soda, baking powder, and salt in a bowl; the smell of cocoa should already get you in the cake mood.
- Cream Butter & Sugar:
- Beat butter and sugar on high, watching as it fluffs up pale and creamy—this is worth the full three minutes for a cloud-like crumb.
- Add Eggs and Vanilla:
- Crack in eggs one at a time, letting each blend in before adding the next, then finish with vanilla for a sweet floral base.
- Pour in the Liquids:
- Pour in buttermilk, rosé wine, and vinegar, letting the batter swirl into a creamy pink base before you add any color.
- Color the Batter:
- Add pink gel a tiny bit at a time and stir gently, aiming for a soft blush hue—you can always add more but never less!
- Bake with Care:
- Divide the batter into pans, smooth the tops, and bake for 30–35 minutes; the top springs back when ready and the kitchen smells subtly of wine and cocoa.
- Cool Completely:
- Let cakes rest in pans for 10 minutes, then turn out onto wire racks until just cool enough to frost without melting.
- Frosting Time:
- Whip butter and cream cheese together until silky, beating in powdered sugar slowly so you don’t get a sugar cloud, then add rosé, vanilla, and a pinch of salt.
- Layer & Crumb Coat:
- Level your cakes if needed, sandwich with generous layers of frosting, and smooth a thin crumb coat all around before chilling for 30 minutes.
- Final Frost and Gold Drip:
- Slather with a final coat of frosting, then pour cooled white chocolate drip along the cake’s edge using a spoon or squeeze bottle, letting it drip artistically.
- Paint the Gold:
- Mix luster dust and vodka to make edible gold, then gently brush it over the white chocolate drip for a regal finish.
- Chill and Enjoy:
- Chill the cake for at least 30 minutes to set, then slice and serve (admiring the gold shimmer as guests marvel is half the fun).
 Save
Save 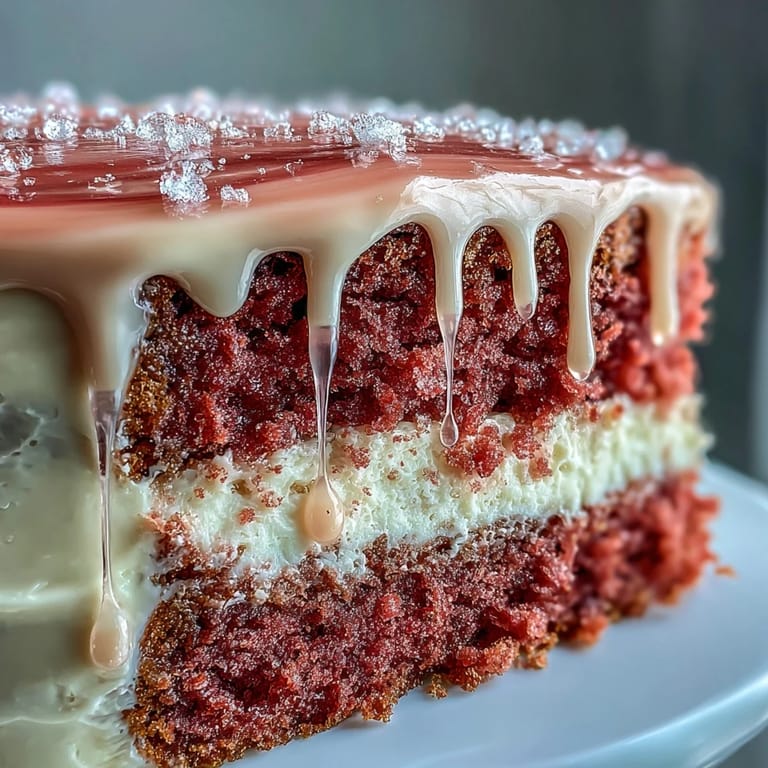 Save
Save There was a moment when the cake stood shining under the dining room lights that it stopped being just a pretty centerpiece and became the symbol of the day’s excitement. When everyone leaned in for group photos, I realized no other dessert could have caught that feeling so perfectly.
Decorating That Turns Heads
Embracing imperfect drips and hand-painted finishes made each cake feel unique—like the celebration itself. Even if your gold isn’t perfectly smooth, no one can resist the shimmer, and every swipe is its own bit of flair. Adding a few edible flowers or a scatter of pink berries around the top elevates the look instantly, almost making you forget the floury handprints still on your apron.
Serving and Storage Secrets
Serving this cake slightly chilled helps keep every frosted slice picture-worthy. If you’re planning ahead, the cake holds up beautifully in the fridge overnight as long as it’s wrapped, and a quick half hour out at room temperature makes it just right for cutting. Leftovers (if there are any) somehow taste even better the next day as all the flavors fully mingle.
Troubleshooting Like a Pro
Don’t worry if your cake layers dome a little—just carefully trim them for perfect stacking, and save the extra bits for snackers hovering in the kitchen. If the white chocolate drip runs too thin, a short wait cools it to just the right texture, and no one will notice the odd thick spot once the gold goes on. Trust that the end result—glamorous or improv—is always delicious and celebration-worthy.
- Keep your frosting handy to patch any nicks or dents before the final show-stopping coat.
- For transport, chill the whole cake so it sets solid and travels in style.
- Relax and enjoy the decorating; the shimmer distracts from all mistakes anyway.
 Save
Save 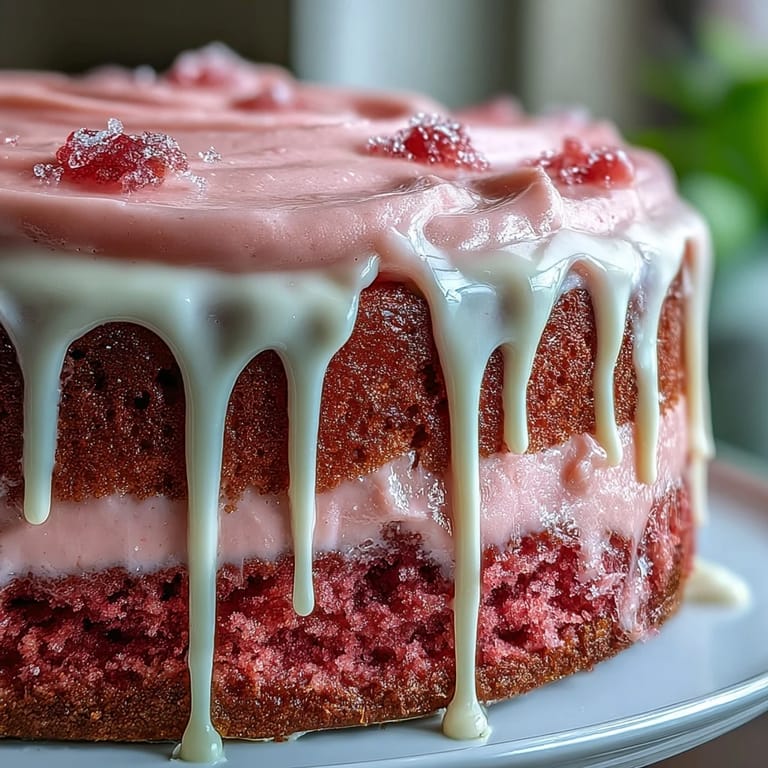 Save
Save If you bake this Rosé Velvet Cake for a celebration, expect smiles and plenty of requests for seconds. It’s a cake as joyful as the occasion itself—enjoy every step and every bite.
Recipe Guide
- → How can I boost the rosé flavor without making the batter too wet?
Brush cooled cake layers lightly with reserved rosé to layer flavor without altering batter consistency. For more intensity, simmer a small amount of rosé until slightly reduced and cool before brushing, or add a teaspoon of rosé to the frosting rather than increasing liquid in the batter.
- → What's the best way to get an even blush-pink color?
Use gel food coloring and add it a little at a time to the batter until you reach your desired shade. Cocoa in the batter mutes bright pinks, so start with small amounts of color and test a spoonful of batter for tone before tinting the entire batch.
- → How do I ensure the cream cheese frosting stays stable for decorating?
Beat room-temperature butter and cream cheese until smooth, then add sifted powdered sugar gradually. Chill the frosting briefly if it loosens, or add a touch more powdered sugar to firm it. Work in a cool kitchen and refrigerate the assembled cake between steps to keep the frosting stable while decorating.
- → Any tips for a clean crumb coat and smooth finish?
Level each layer with a serrated knife or cake leveler for even stacking. Apply a thin crumb coat and chill for at least 30 minutes to set crumbs before the final coat. Use an offset spatula and a turntable to smooth frosting and scrape excess for a professional finish.
- → How do I control the gold drip so it doesn't run too far down the sides?
Let the white-chocolate drip cool until thick but still pourable; test on the edge of a chilled cake or a small bowl rim first. A thicker ganache or slightly less cream will slow the drip. Chill the cake after applying the drip to set it before painting with gold luster.
- → What's a good non-alcoholic substitute for rosé?
Sparkling grape juice or chilled white grape juice can replace rosé for similar sweetness and acidity. For a hint of color and fruitiness, add a splash of pomegranate or cranberry juice to balance sweetness without introducing alcohol.