 Save
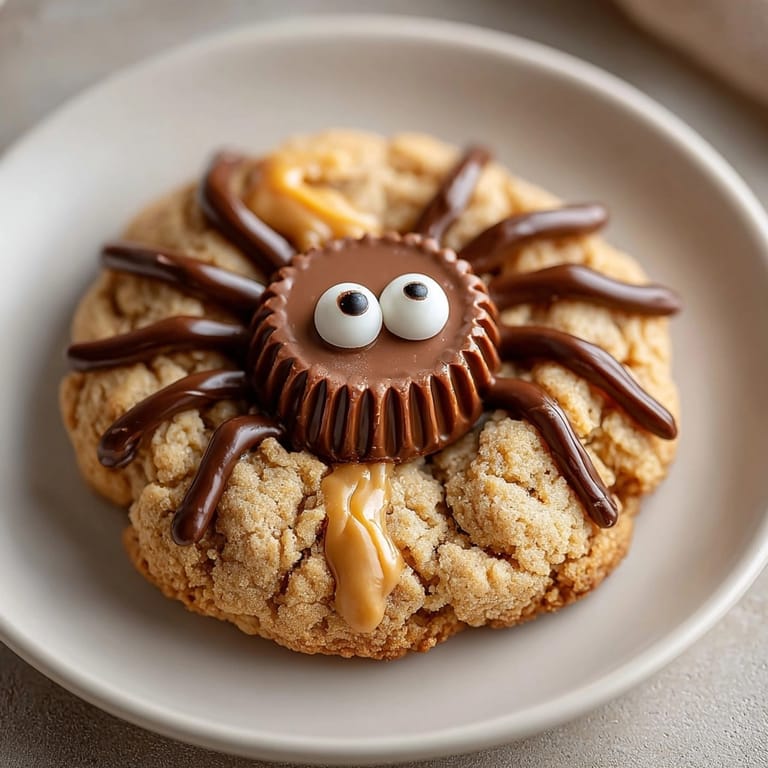
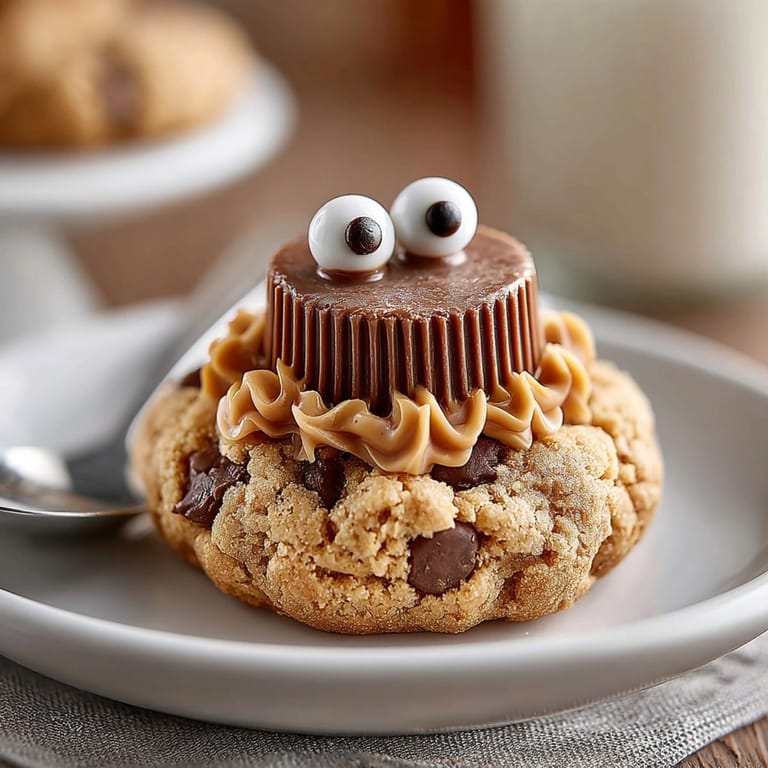
Save These adorable Peanut Butter Spider Cookies bring amazing fun and flavor to any Halloween gathering or kids’ party. They bake up chewy, buttery, and nutty, and decorating them with chocolate and candy eyes adds giggles and joy to every bite. I make these every October with my little ones and they cannot wait to craft their own cookie spiders.
I first whipped these up for a school Halloween party and the smiles were priceless. Now we make them together most every year so everyone gets to join in the decorating.
Ingredients
- Unsalted butter: Choose butter at room temperature for best creaming and even consistency
- Creamy peanut butter: Opt for a well-stirred brand to avoid dry cookies
- Granulated sugar: Adds sweetness and helps cookies crisp
- Light brown sugar: Offers extra moisture and caramel notes
- Large egg: Use fresh eggs for richer flavor and binding
- Vanilla extract: Select pure vanilla for depth in dough
- All-purpose flour: Sift if possible for a delicate crumb and smooth dough
- Baking soda: Essential for a gentle rise and softer texture
- Salt: Balances sweetness and brings out the nutty flavor
- Mini chocolate peanut butter cups: Go for high-quality candies to hold their shape and flavor
- Semisweet chocolate chips: Melt smoothly and work great for piping legs
- Candy eyes: Adds whimsical charm and turns cookies into friendly spiders
Tired of Takeout? 🥡
Get 10 meals you can make faster than delivery arrives. Seriously.
One email. No spam. Unsubscribe anytime.
Instructions
- Prepare the Baking Sheets:
- Line two baking sheets with parchment paper to prevent sticking and ensure easy cleanup
- Cream the Butter and Sugars:
- Mix unsalted butter creamy peanut butter granulated sugar and light brown sugar in a large bowl with an electric mixer for about two minutes until the mixture turns light and fluffy This step sets up your cookies for perfect texture
- Incorporate Wet Ingredients:
- Add the egg and vanilla extract to the butter mixture and blend just until combined The egg brings structure and moisture while vanilla enhances flavor
- Combine Dry Ingredients:
- Whisk all-purpose flour baking soda and salt in a separate bowl This makes sure leavening agents and salt are evenly distributed
- Mix Dry and Wet Mixtures:
- Gradually spoon dry mixture into wet mixture blending on low speed or with a spatula Stop once everything is just incorporated to avoid tough cookies
- Portion the Dough:
- Scoop tablespoon-sized balls onto prepared baking sheets Space cookies about two inches apart for room to spread
- Bake the Cookies:
- Transfer sheets to the oven and bake at three hundred fifty degrees Fahrenheit for eight to ten minutes The edges should be set and just golden but the centers soft
- Add Peanut Butter Cups:
- Pull cookies out and immediately press a mini chocolate peanut butter cup into the center of each cookie Cool the cookies on the baking sheets for five minutes so cups set snugly
- Cool and Decorate:
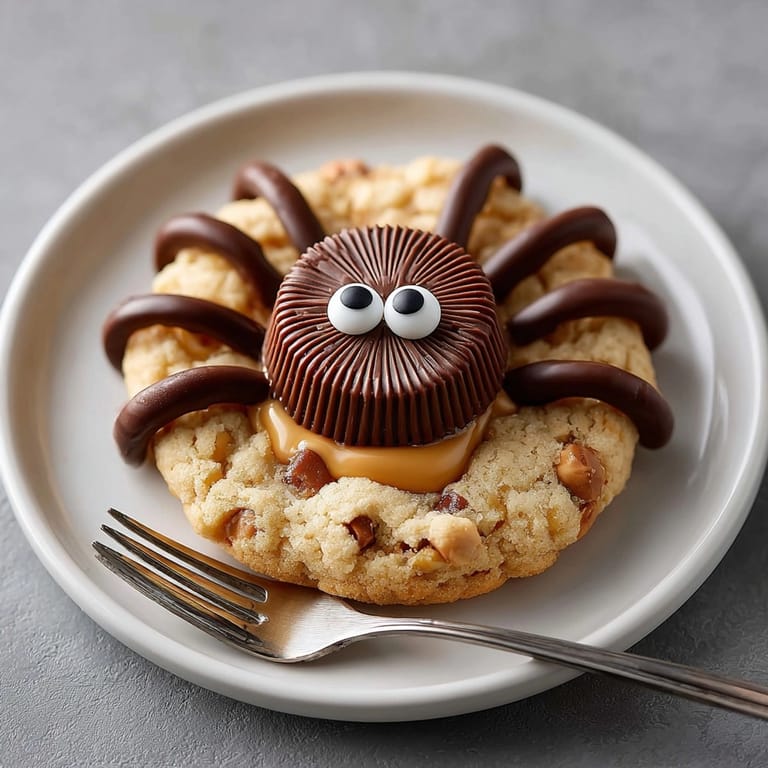
- Move cookies to a wire rack to fully cool Transfer melted semisweet chocolate to a piping bag Snip a very small opening and gently pipe three to four legs on each side of the peanut butter cup for the spider legs
- Attach Candy Eyes:
- Using a dab of melted chocolate stick two candy eyes onto the top of each peanut butter cup Allow chocolate legs and eyes to set before serving for best results
 Save
Save My favorite part is pressing those tiny candy eyes into the warm chocolate With my daughter at my elbow we always laugh at how some spiders look surprised and some look sleepy The peanut butter aroma brings back so many autumn memories from when my sons were tiny and sneaking tastes from the mixing bowl
Storage Tips
Keep cookies in an airtight container on your counter for up to four days They stay soft as long as you seal them quickly after decorating For longer storage freeze baked undecorated cookies for up to three months Defrost at room temperature decorate and enjoy fresh flavors
Ingredient Substitutions
Try sunflower seed butter in place of peanut butter for a nut free version You can swap mini chocolate truffles or plain chocolate buttons if peanut butter cups are not available Decorating works equally well with white or dark chocolate chips
Serving Suggestions
Serve these cookies with a cold glass of milk or hot cocoa for a festive treat Arrange them on a platter with fake spider webs for extra Halloween effect They also make splendid favors for classroom parties birthday celebrations or fall bake sales
Cultural and Holiday Context
Food crafts are a beloved Halloween tradition in the United States These spider cookies always light up a party table with color and personality The recipe reflects the playful creativity that makes American Halloween baking a cherished seasonal event
Seasonal Adaptations
Use colored candy eyes or sprinkle edible glitter for winter or birthday celebrations Switch chocolate cups to white chocolate or caramel centers to match different holidays Shape cookies into pumpkins or ghosts for broader seasonal appeal Helpful Notes Cookies taste best fresh but store and freeze very well Melt chocolate slowly at low heat for easiest piping Test oven temp before baking for reliable results
Success Stories
Kids and adults alike have raved about bringing these to community bake sales or classroom events I often hear that families made memories together rolling and decorating their own edible spiders Parents say it motivates fussy eaters to join in the kitchen fun
Freezer Meal Conversion
Freeze raw dough balls on a sheet then store in zip bags Bake straight from frozen adding a minute or two to baking time After baking decorate as usual This approach lets you prep cookies for busy fall weekends or holidays in advance
 Save
Save These sweet spider cookies always make Halloween baking magical. Let everyone decorate their own and watch delight come alive with every bite.
Recipe Guide
- → How do I make the spider legs?
Melt semisweet chocolate chips, transfer to a piping bag, and pipe legs on each side of the chocolate cup after cookies are cool.
- → Can I make these without peanut butter?
Yes, use sunflower seed butter for the cookies and substitute the peanut butter cups with nut-free chocolate candies.
- → How should I store the cookies?
Place cookies in an airtight container at room temperature for up to 4 days to maintain freshness.
- → Can I use different types of chocolate for decoration?
Dark chocolate or milk chocolate both work well for creating the spider legs and adhering the candy eyes.
- → Are these suitable for vegetarian diets?
Yes, all ingredients are vegetarian-friendly; just check labels for any dietary restrictions in candy decorations.
- → How many cookies does this make?
The instructions yield 24 cookies, each decorated with chocolate cups and candy eyes for spider appeal.