 Save
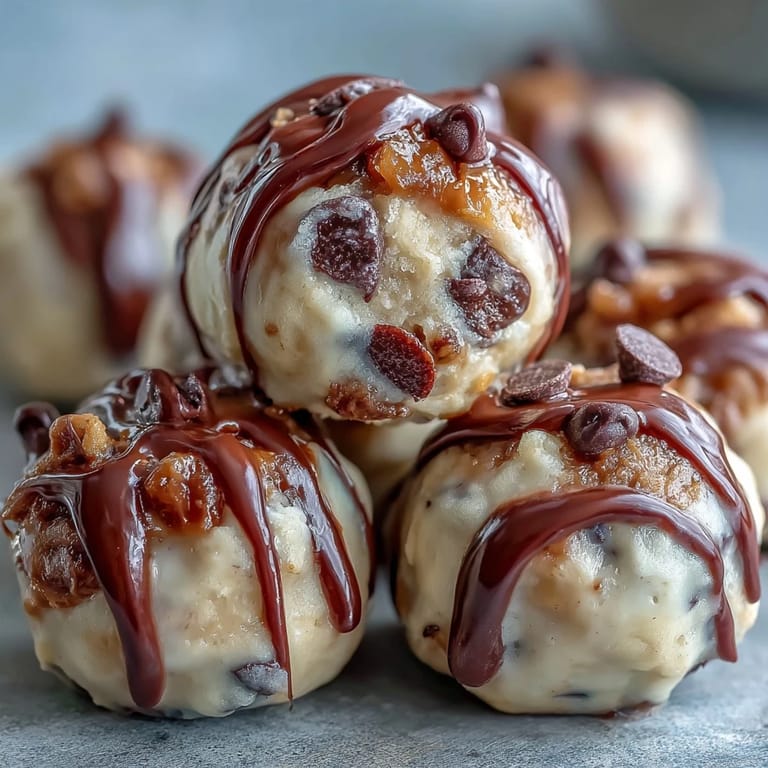
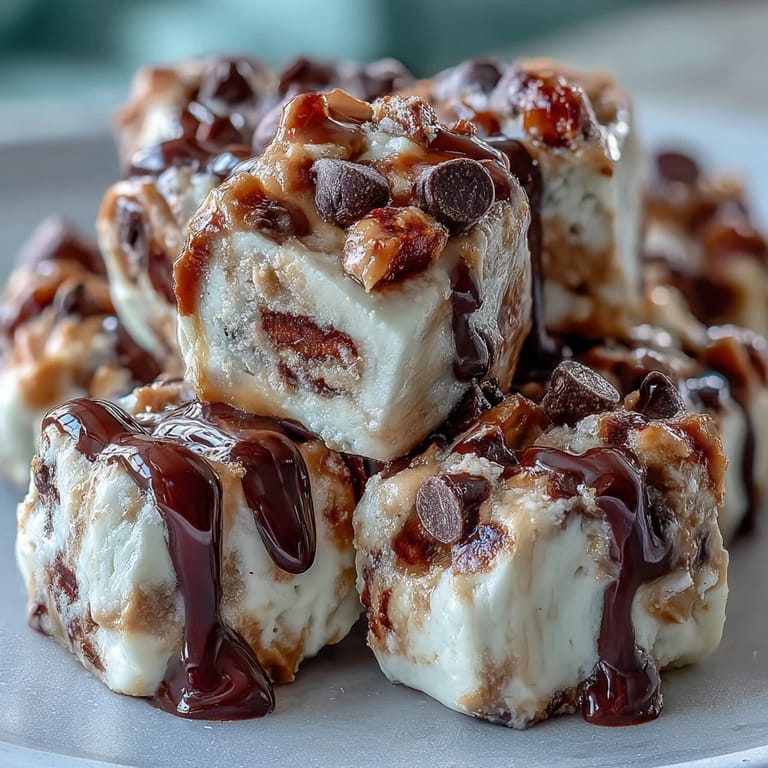
Save My roommate had just started her fitness journey, and one afternoon she stood in our kitchen looking frustrated at a protein powder container like it held the secrets to the universe. I suggested we try something different, something that tasted like dessert but actually felt nourishing. We mixed Greek yogurt with peanut butter and honey, froze the mixture in little portions, and by evening she was sneaking them straight from the freezer. Those bites became her pregym ritual, and honestly, they've become mine too.
Last summer during a heatwave, when the kitchen felt like an oven and nobody wanted to cook, I made a batch of these and brought them to my friend's pool party. Watching people's faces light up when they bit into something cold and creamy that was also basically a protein bar—that's when I realized these weren't just a snack, they were a solution to a problem I didn't know I had.
Ingredients
- Plain Greek yogurt (1 cup): Full-fat versions give you the creamiest texture, but low-fat works too if you're watching calories; the key is using plain so you control the sweetness entirely.
- Creamy natural peanut butter (½ cup): Look for the kind where the oil sits on top—that's how you know there are no weird additives hiding in there.
- Honey (2 tablespoons): It dissolves smoothly into the yogurt and adds just enough sweetness to make these feel like a treat without being over the top.
- Mini chocolate chips (2 tablespoons, optional): These stay somewhat soft when frozen, giving you little bursts of richness throughout.
- Chia seeds (1 tablespoon, optional): They add a subtle texture and boost the nutrition without announcing themselves loudly.
- Vanilla extract (½ teaspoon, optional): A small splash transforms the peanut butter flavor into something more rounded and sophisticated.
- Ground cinnamon (pinch, optional): This brings warmth and makes the whole thing feel less like diet food and more like an actual dessert.
Tired of Takeout? 🥡
Get 10 meals you can make faster than delivery arrives. Seriously.
One email. No spam. Unsubscribe anytime.
Instructions
- Blend your base:
- In a medium bowl, combine the Greek yogurt, peanut butter, and honey, whisking until everything comes together in a smooth, homogenous mixture with no streaks or lumps. This should take about a minute of steady whisking, and you'll notice the yogurt softening the peanut butter as you go.
- Add your flavor notes:
- Stir in the vanilla and cinnamon if you're using them, tasting as you go because these ingredients can be adjusted to your preference. This is the moment where you're really deciding what personality these bites will have.
- Set up your molds:
- Grab a mini-muffin tin or silicone mold and line it with liners or give it a light grease—you want to make sure nothing sticks when you're trying to get these out later. Silicone molds are honestly the easiest option because they release almost without trying.
- Portion carefully:
- Using a spoon, distribute about 1 tablespoon of the mixture into each cavity, smoothing the tops as you go. You're aiming for consistency so they all freeze at the same rate and look intentional rather than chaotic.
- Top with intention:
- Sprinkle your chosen add-ins over each bite—chocolate chips, chia seeds, or whatever combination excites you. If you're going for the chocolate swirl, drizzle a tiny amount of melted dark chocolate over the top and use a toothpick to create those satisfying streaks.
- Freeze until solid:
- Pop the tray into the freezer for at least 2 hours, though overnight is even better because it gives everything time to completely set up. You'll know they're ready when they feel hard to the touch and don't give at all when you press them gently.
- Release and store:
- Run warm water briefly along the bottom of the tray to loosen things up, then pop each bite into a freezer-safe container or bag. They'll keep for up to 2 weeks, though they rarely last that long in a house where people know about them.
 Save
Save There's something quietly joyful about opening your freezer and remembering you made something intentional for yourself. These bites sit there looking simple, but they're actually an act of self-care disguised as a snack.
Customization Ideas
The beauty of this recipe is that it's genuinely flexible without becoming chaotic. I've made versions with mashed berries folded in, which gives you this gorgeous pink mixture and a slight tartness that cuts through the richness perfectly. Crushed granola adds texture, melted dark chocolate for dipping turns them into something closer to candy, and swapping peanut butter for almond or cashew butter gives you an entirely different flavor profile worth exploring.
Storage and Serving
Keep these in a freezer-safe container, and they'll happily live in your freezer for up to 2 weeks, though I usually eat through a batch in less time. They work beautifully as a post-workout snack, a midday energy boost, or that thing you eat directly from the freezer when you want something satisfying but not heavy. You can also dip them in melted chocolate after they freeze and let them set again for extra decadence.
Why This Works as More Than Just a Snack
These bites are protein-dense enough to actually satisfy hunger, but sweet enough to feel like a real treat, which means they bridge that gap between healthy and indulgent in a way that rarely happens. They're portable, they don't require refrigeration if you're keeping them in an insulated bag, and they taste expensive even though they cost almost nothing to make. Once people taste them, they stop asking why you're not buying fancy protein bars and start asking for the recipe instead.
- Make a double batch and freeze them in two containers so you always have backup when the first one runs out.
- If you want them sweeter, add another tablespoon of honey, but do it gradually so you don't oversweeten and make them cloying.
- These are genuinely better at the 2-hour mark than they are at the 3-hour mark, so don't overthink the freezing time once they're solid.
 Save
Save This is one of those recipes that teaches you that simple combinations of good ingredients need nothing else to become something you genuinely crave. Make them once and you'll understand why they became my go-to.
Recipe Guide
- → What’s the best type of yogurt to use?
Use plain Greek yogurt, either full-fat or low-fat, depending on your preference for creaminess and texture.
- → Can I substitute peanut butter with other nut butters?
Yes, almond or cashew butter work well and will give a different but delicious flavor profile.
- → How long should I freeze the bites?
Freeze for at least 2 hours or until the bites are fully solid for easiest serving.
- → Are there options for adding flavor variations?
Absolutely. You can mix in mashed berries, vanilla extract, cinnamon, or swirl in melted dark chocolate before freezing.
- → How should I store the bites after freezing?
Store the frozen bites in a freezer-safe container or bag for up to 2 weeks to maintain freshness.
- → Can these bites be enjoyed if I have dietary restrictions?
They are vegetarian and can be gluten-free if you use gluten-free add-ins. Check ingredient labels if you have allergies.