 Save
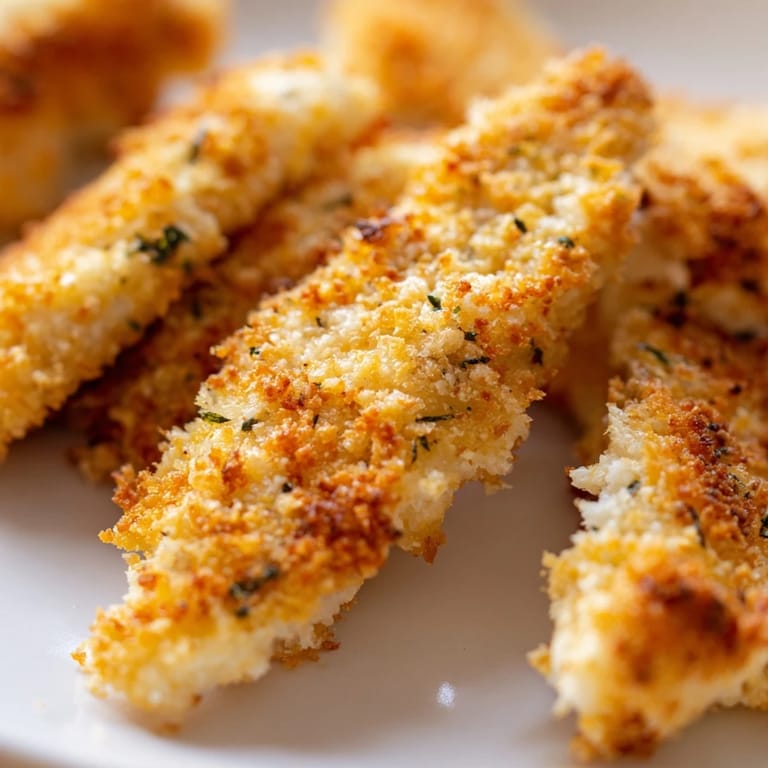
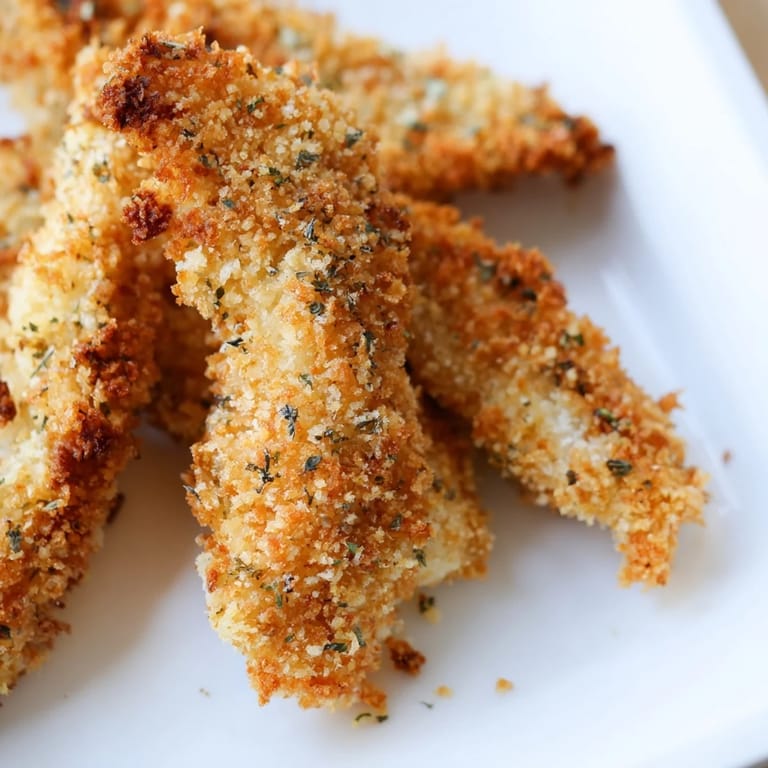
Save My youngest refused to eat anything that wasn't shaped like a dinosaur until I made these chicken strips on a rainy Tuesday. The kitchen smelled like garlic and toasted breadcrumbs, and suddenly the pickiest eater at the table was asking for seconds. I learned that sometimes the secret to getting kids (and adults) excited about dinner isn't fancy ingredients, it's that satisfying crunch that makes everyone reach across the table before you've even set the platter down. These strips have since become my go-to for everything from hectic weeknights to game day spreads.
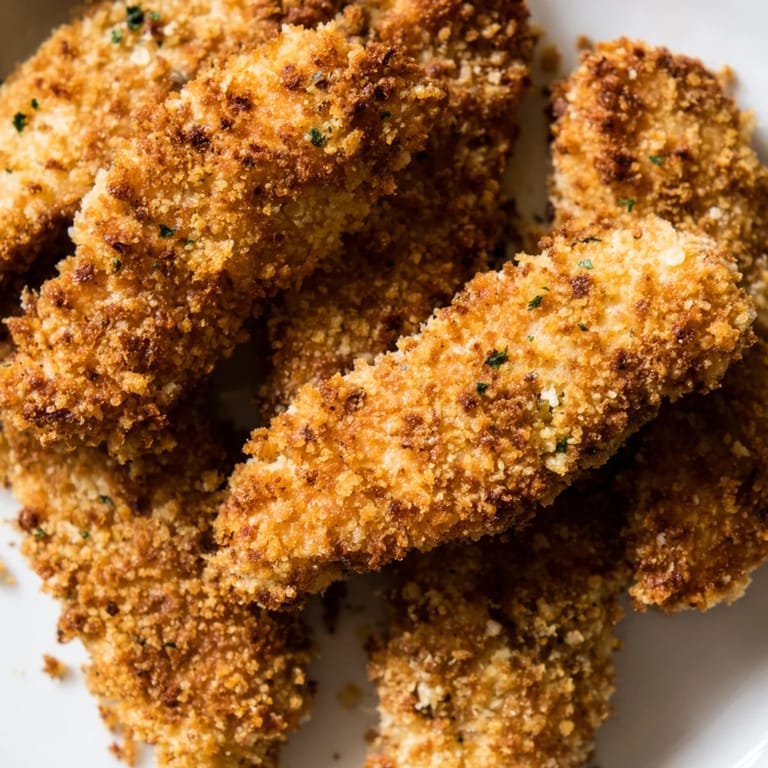
I started making these for a casual backyard gathering last summer, and I still remember the moment my neighbor asked if I'd secretly ordered takeout. There's something about the way the panko gets deeply golden in the oven, almost like it's been fried, that tricks everyone into thinking you worked way harder than you did. I've since brought them to potlucks, packed them in lunchboxes, and served them on nights when I just needed something reliable and crowd pleasing. They've never let me down, and the compliments never get old either.
Ingredients
- Boneless, skinless chicken breasts or tenders (500 g): I always pat them bone dry with paper towels before seasoning, because any moisture will steam the coating instead of crisping it up beautifully.
- Salt (1/2 tsp) and black pepper (1/4 tsp): Simple seasoning on the chicken itself ensures every bite has flavor, not just the crispy exterior.
- All purpose flour (100 g): This first coat gives the egg mixture something to cling to, it's the foundation that keeps everything from sliding off in the oven.
- Eggs (2 large) and mayonnaise (2 tbsp): The mayo adds richness and helps the panko stick like glue, I learned this trick after too many sad, bare patches on my early attempts.
- Panko breadcrumbs (120 g): These Japanese style crumbs are lighter and airier than regular breadcrumbs, which is exactly why they crisp up so perfectly without getting dense.
- Dried Italian herbs (1 1/2 tsp): I use a blend of oregano, thyme, and basil, but you can swap in whatever dried herbs are sitting in your cupboard.
- Garlic powder (1/2 tsp) and smoked paprika (1/2 tsp): These two add warmth and a subtle smokiness that makes people ask what your secret is.
- Cayenne pepper (1/4 tsp, optional): A tiny pinch gives just enough heat to keep things interesting without scaring off anyone at the table.
- Olive oil (2 tbsp): A light drizzle or spray before baking is what transforms the panko from pale to deeply golden and crispy.
Tired of Takeout? 🥡
Get 10 meals you can make faster than delivery arrives. Seriously.
One email. No spam. Unsubscribe anytime.
Instructions
- Prep your oven and pan:
- Preheat your oven to 220°C (425°F) and line a baking sheet with parchment paper, or better yet, set a wire rack on top for air circulation that crisps every side. I've done it both ways, and the rack makes a noticeable difference if you have one.
- Cut and season the chicken:
- Pat the chicken completely dry, then slice it into strips about 2 cm wide so they cook evenly. Season each piece with salt and pepper, don't skip this step or you'll end up with a beautifully crispy but bland bite.
- Set up your breading station:
- Grab three shallow bowls and fill the first with flour, the second with whisked eggs and mayonnaise, and the third with panko mixed with all your herbs and spices. This assembly line setup keeps your hands from turning into a sticky, breaded mess.
- Coat each strip:
- Dredge a chicken strip in the flour and shake off the excess, dip it fully in the egg mixture, then press it into the panko to coat every surface. I use one hand for wet ingredients and one for dry to keep things tidy, though I still make a mess sometimes.
- Arrange and oil:
- Lay each coated strip on your prepared baking sheet with a little space between them so they don't steam each other. Drizzle or spray the tops lightly with olive oil, this is the magic step that makes them golden.
- Bake and flip:
- Slide the pan into the oven and bake for 18 to 22 minutes, flipping the strips halfway through so both sides get evenly crispy. They're done when the internal temperature hits 74°C (165°F) and the coating looks deeply golden.
- Rest before serving:
- Let the strips cool on the pan for 2 to 3 minutes, this brief rest lets the coating set and crisp up even more. Resist the urge to pile them immediately or they'll steam and soften.
 Save
Save The first time I served these with a little bowl of honey mustard and spicy sriracha mayo, my husband looked up mid bite and said they tasted better than anything we'd ordered from a restaurant. It wasn't just the flavor, it was the fact that we were sitting around the table instead of unwrapping greasy paper bags. These strips have a way of turning a regular dinner into something everyone actually looks forward to, and that's worth more than any takeout menu.
Serving Suggestions
I love setting out a few dipping sauces, honey mustard, ranch, and a spicy sriracha mayo, so everyone can customize their plate. These strips pair beautifully with a simple green salad, roasted sweet potato wedges, or even a pile of crispy fries if you're leaning into the comfort food vibe. For drinks, a crisp Sauvignon Blanc or a cold lager cuts through the richness and keeps things feeling light. Sometimes I'll serve them as an appetizer at parties, cut into smaller pieces with toothpicks, and they disappear faster than I can refill the platter.
Make It Your Own
If you want a cheesy twist, toss a handful of grated Parmesan into the panko mixture before coating the chicken, it adds a salty, nutty layer that's hard to resist. For a gluten free version, swap in gluten free panko and all purpose flour, the texture stays just as crispy. I've also made these with Greek yogurt instead of mayonnaise when I wanted to lighten things up, and honestly, the difference is barely noticeable. You can adjust the spice level too, add more cayenne if you like heat, or leave it out entirely for picky eaters and kids.
Storage and Reheating
Leftovers keep well in an airtight container in the fridge for up to three days, though they rarely last that long in my house. To reheat, skip the microwave (it'll make them soggy) and pop them back in a 200°C (400°F) oven for about 8 minutes until they're crispy again. I've even frozen these after baking, then reheated them straight from the freezer for a quick lunch, and they still taste great.
- Store cooled strips in a single layer if possible to prevent them from sticking together and losing their crunch.
- Reheat on a wire rack in the oven for the crispiest results, a baking sheet works too but the bottoms might soften slightly.
- If freezing, let them cool completely first, then arrange in a freezer safe bag with parchment between layers to keep the coating intact.
 Save
Save These crispy panko chicken strips have become one of those recipes I can make without thinking, and somehow they still feel special every single time. Whether you're feeding a crowd, a picky toddler, or just yourself after a long day, they deliver that perfect combination of comfort and crunch that makes everything feel a little bit better.
Recipe Guide
- → How do I ensure the chicken strips stay crispy?
Use a wire rack or parchment paper on your baking sheet to allow air circulation underneath. Drizzle with olive oil before baking and flip halfway through cooking. Allow strips to cool for 2-3 minutes after removing from the oven for maximum crispiness.
- → Can I prepare these ahead of time?
Yes, you can bread the chicken strips up to 4 hours ahead and refrigerate them on the baking sheet. Bake directly from the refrigerator, adding 2-3 minutes to the cooking time.
- → What's the best way to check if chicken is cooked through?
Use an instant-read thermometer to ensure the internal temperature reaches 165°F (74°C). Alternatively, cut the thickest strip open to verify no pink remains inside.
- → Which dipping sauces pair best with these strips?
Honey mustard, ranch dressing, and spicy sriracha mayo are excellent choices. For a lighter option, try Greek yogurt mixed with herbs or fresh lemon juice.
- → How can I make this gluten-free?
Simply substitute all-purpose flour with gluten-free flour and use certified gluten-free panko breadcrumbs. The breading technique and cooking method remain identical.