 Save
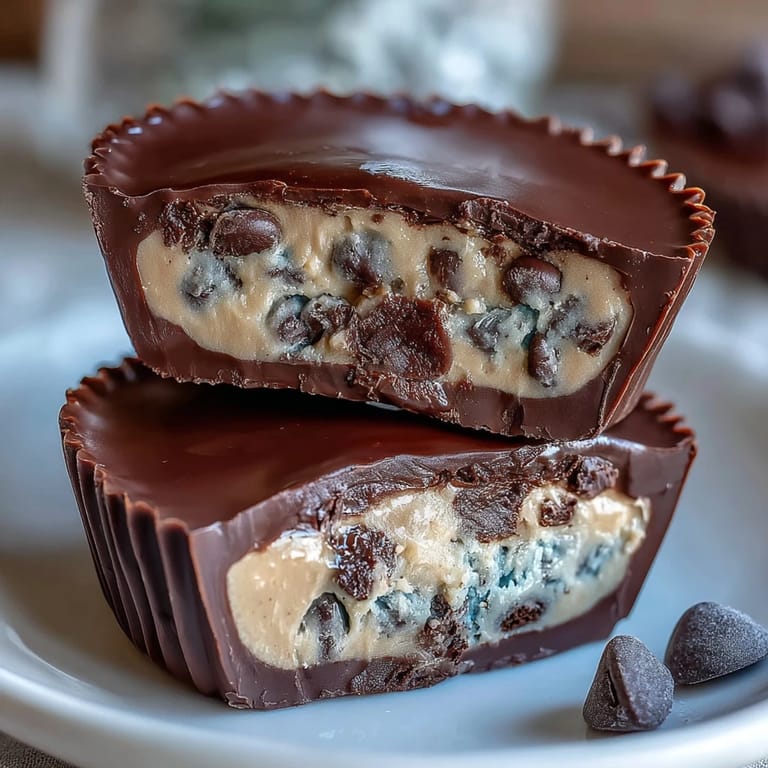
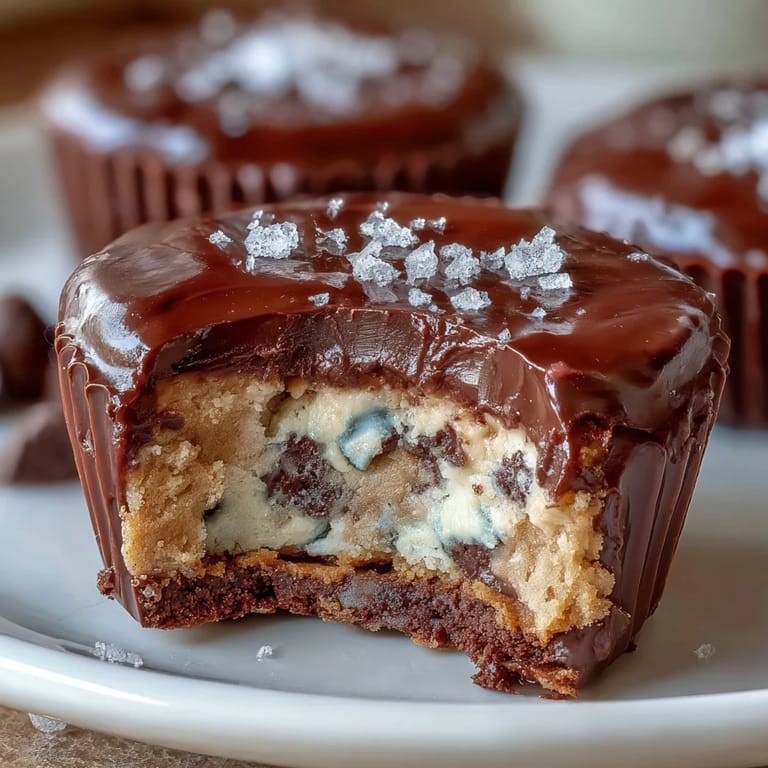
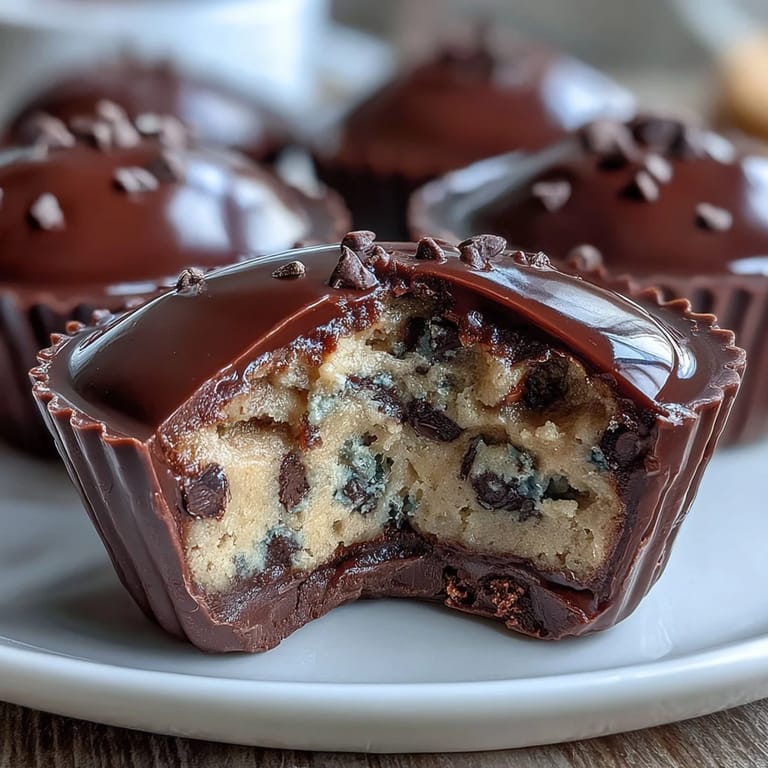
Save My friend Sarah texted me a photo of a candy store display one random Tuesday, and I couldn't stop thinking about those glossy peanut butter cups stacked in the window. That evening, standing in my kitchen with chocolate-stained fingers, I decided to make my own version but with a twist—what if I stuffed them with actual cookie dough instead of just peanut butter? The first batch came out lopsided and messy, but one bite told me I'd stumbled onto something special. Now these little cups disappear faster than I can make them, and honestly, I don't mind one bit.
I made a batch for my book club last month, and watching everyone's faces light up when they bit into them felt better than any compliment I'd gotten in weeks. One of the members, who usually politely picks at desserts, ate three and asked for the recipe before she even sat down. That's when I knew this wasn't just a fun project—it was something that could genuinely make people happy.
Ingredients
- Unsalted butter (1/4 cup softened, plus 2 tbsp melted): The softened butter creates that tender cookie dough texture, while melted butter in the peanut butter layer helps everything bind together smoothly without being greasy.
- Light brown sugar and granulated sugar (1/4 cup plus 2 tbsp total): This combination gives the dough that authentic cookie flavor and chewy structure—don't skip either one or the taste won't be quite right.
- Vanilla extract (1/2 tsp): Just a whisper of vanilla deepens the cookie dough flavor without overpowering the other layers.
- Milk (1 tbsp): This keeps the dough soft and moldable; it's the secret to pressing it into place without crumbling.
- All-purpose flour, heat-treated (1/2 cup): Heat-treating the flour is non-negotiable when eating raw dough—microwave it for a minute or bake it briefly, then let it cool completely before mixing.
- Mini chocolate chips (1/3 cup): These distribute better than regular chips and melt slightly into the dough, creating pockets of chocolate throughout.
- Creamy peanut butter (1/2 cup): Use a good-quality natural peanut butter if you can; it tastes fresher and the layer will taste more like homemade candy than store-bought.
- Powdered sugar (1/4 cup): This sweetens the peanut butter layer without making it grainy or dense.
- Semisweet or milk chocolate chips (2 cups): The chocolate coating is your frame, so choose something you'd actually eat on its own—this isn't the place to use cheap chips.
- Coconut oil or vegetable oil (2 tsp): Just a small amount makes the chocolate smooth and glossy without changing its flavor, and it helps it set beautifully.
Tired of Takeout? 🥡
Get 10 meals you can make faster than delivery arrives. Seriously.
One email. No spam. Unsubscribe anytime.
Instructions
- Heat-treat your flour first:
- Pop your flour in the microwave for one minute, stirring halfway through, or bake it at 350°F for five minutes. This keeps the raw dough safe to eat while maintaining its tender crumb. Let it cool completely before you use it.
- Cream the butter and sugars until fluffy:
- In a medium bowl, beat the softened butter with both sugars until the mixture turns pale and light, about two minutes with an electric mixer. This is the foundation of your cookie dough texture—don't rush it.
- Add the wet ingredients and flour:
- Mix in the vanilla and milk until incorporated, then add your cooled heat-treated flour and salt. Stir just until the dough comes together—you don't want to overwork it.
- Fold in the mini chocolate chips:
- Gently stir in the chocolate chips by hand, making sure they're evenly distributed throughout the dough. Set the bowl in the fridge while you move on to the chocolate coating.
- Prepare your chocolate coating:
- Line your muffin tin with paper liners—this makes unmolding so much easier later. Melt your chocolate chips with the coconut oil in a microwave-safe bowl using 30-second bursts, stirring between each one until everything is completely smooth and glossy.
- Layer the chocolate base:
- Spoon about a tablespoon of melted chocolate into each liner, then tilt and tap the muffin tin so the chocolate coats the bottom evenly. Pop the tin in the freezer for exactly ten minutes—this gives you a stable base for the next layer.
- Make the peanut butter filling:
- While the chocolate sets, mix together your creamy peanut butter, melted butter, powdered sugar, and a pinch of salt until completely smooth and spreadable. The melted butter here is key because it keeps the peanut butter from being too thick to work with.
- Add the peanut butter layer:
- Pull the muffin tin from the freezer and drop a heaping teaspoon of your peanut butter mixture onto the chocolate base in each cup. Use the back of a spoon to flatten it slightly, creating an even layer.
- Press in the cookie dough:
- Scoop about a teaspoon of your chilled cookie dough and gently press it onto the peanut butter layer in each cup. The dough should sit on top like a little treasure, ready to be sealed under chocolate.
- Seal with the final chocolate layer:
- Spoon enough melted chocolate over each cup to cover all the fillings completely, smoothing the tops so everything looks intentional and beautiful. This final coat is what keeps all your hard work from falling apart.
- Chill until completely set:
- Pop the muffin tin into the fridge or freezer for at least twenty minutes, though thirty is even better if you have the patience. You'll know they're ready when the chocolate is firm and doesn't give when you gently press it.
- Store for freshness:
- Once set, pop your peanut butter cups out of the liners and store them in an airtight container in the refrigerator. They'll keep for up to two weeks, though they rarely last that long.
 Save
Save There's something almost meditative about layering these cups, especially late at night when the house is quiet and you're just working with chocolate and peanut butter and the promise of something delicious. By the time you've finished the last one, your hands are stained and there's cocoa powder on your shirt, but you feel like you've created something worth sharing.
Why This Combination Works So Well
The magic here is that you're combining three beloved treats into one perfect bite—and they don't compete with each other, they complement each other. The richness of the chocolate holds the sweetness of the peanut butter, while the cookie dough adds texture and a familiar comfort that makes you reach for another cup before you've even finished chewing the first one. Every layer serves a purpose, and nothing feels out of place or unnecessary.
Variations That Actually Work
I've experimented with dark chocolate for a deeper, less sweet version that feels more sophisticated, and it's genuinely lovely. Some batches I've sprinkled just a tiny pinch of flaky sea salt on top of the final chocolate layer before it sets—it sounds weird until you taste it, and then it becomes all you want. If you're cooking for someone with a dairy allergy, swap in almond milk or oat milk in the cookie dough and use a coconut-oil-based chocolate, and honestly, the results are just as good.
Troubleshooting and Common Moments
The first time I made these, my chocolate base was too thin and the peanut butter mixture sank through when I pressed the cookie dough on top—so now I always give that first chocolate layer the full ten minutes in the freezer, no shortcuts. If your dough feels too crumbly to work with, add an extra half tablespoon of milk and let it rest for five minutes. If your chocolate looks dull instead of glossy, you probably overheated it; next time, be patient with those short bursts and keep stirring between each one.
- If chocolate seizes (gets grainy), add a teaspoon of coconut oil and stir gently—sometimes it can be salvaged.
- Make sure all your layers are at the right temperature or they'll separate; cold dough on warm chocolate is your enemy.
- These taste even better after they've been in the fridge overnight, so don't judge them fresh from the freezer.
 Save
Save These little cups have become my answer to almost every occasion—a gift for neighbors, a way to apologize for being a terrible friend at staying in touch, a celebration of nothing in particular. They're proof that sometimes the best homemade treats are the ones that combine your favorite flavors in a way that shouldn't work but absolutely does.
Recipe Guide
- → How is the cookie dough made safe to eat without eggs?
The cookie dough uses heat-treated flour to eliminate any potential bacteria, making it safe to enjoy raw without eggs.
- → Can I use dairy-free alternatives in this preparation?
Yes, replacing regular milk with almond or oat milk works well, and dark chocolate can be used to keep it dairy-free.
- → What is the best way to melt the chocolate for coating?
Melt chocolate chips with coconut or vegetable oil in short microwave intervals, stirring frequently until smooth.
- → How long should these cups chill before serving?
Chill in the fridge or freezer for at least 20 minutes to allow the chocolate coating to set firmly.
- → Are there common allergens in these cups to be aware of?
Yes, they contain peanuts, milk, wheat (gluten), and potentially soy depending on the chocolate chips used.