 Save
Save The first time I made this for a potluck, my friend Sarah actually moaned out loud when she took her first bite. It was one of those perfect winter nights where everyone had been standing around a fire pit, and suddenly this warm, chocolatey thing appeared on the table. Within ten minutes, the entire 9x13 pan had vanished, and people were literally scraping their forks against the bottom hoping for one more taste.
Ive made this for everything from Tuesday night family dessert to my dads birthday celebration, and it never fails to disappear completely. Last summer, my niece helped me make it for our annual block party, and she was so proud telling everyone she stirred the batter herself. Theres something about the combination of warm chocolate cake and melted peanut butter cups that just makes people feel like kids again.
Ingredients
- Devils food chocolate cake mix: The box shortcut that makes this entirely foolproof and delicious every single time
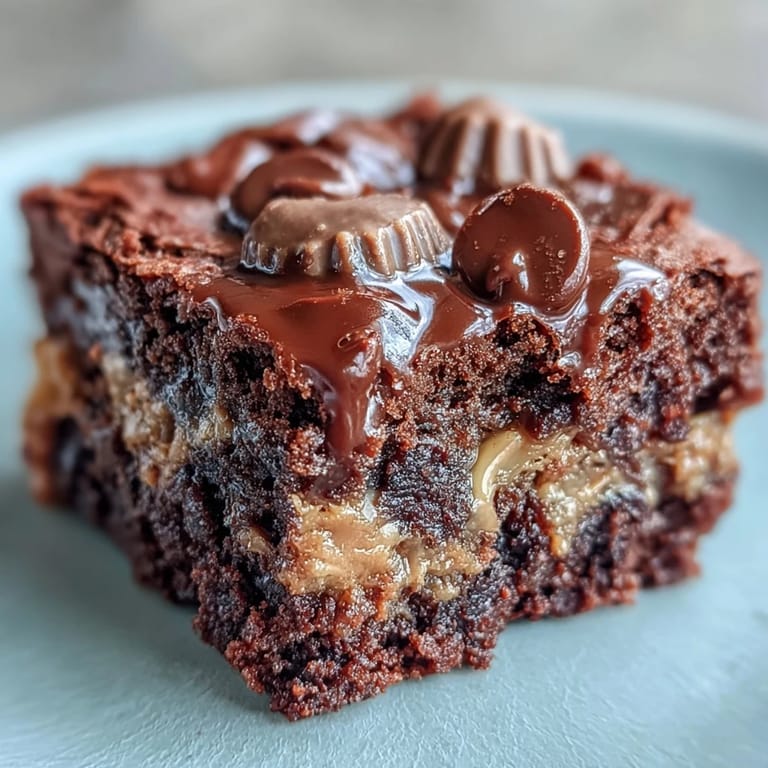
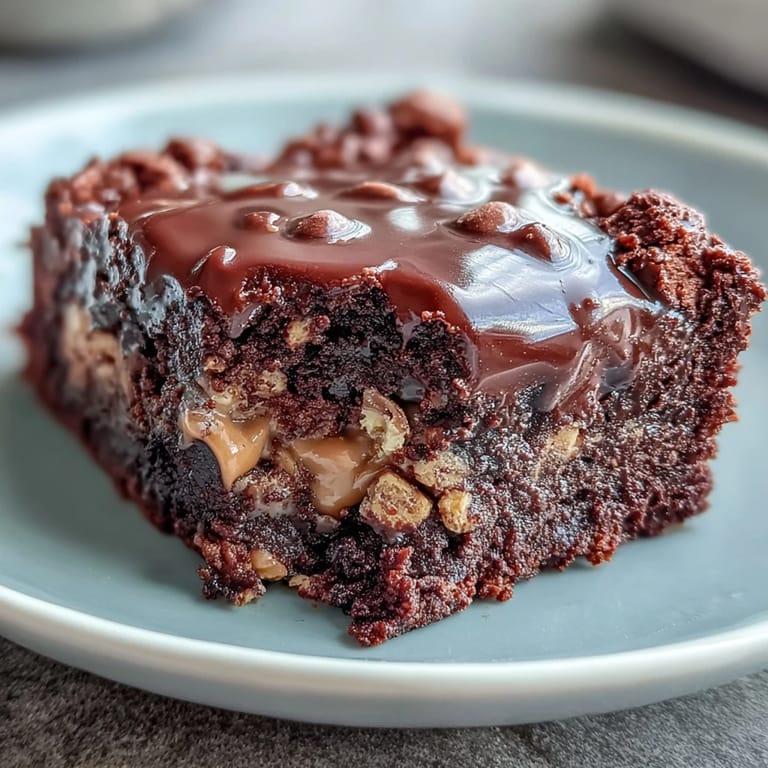
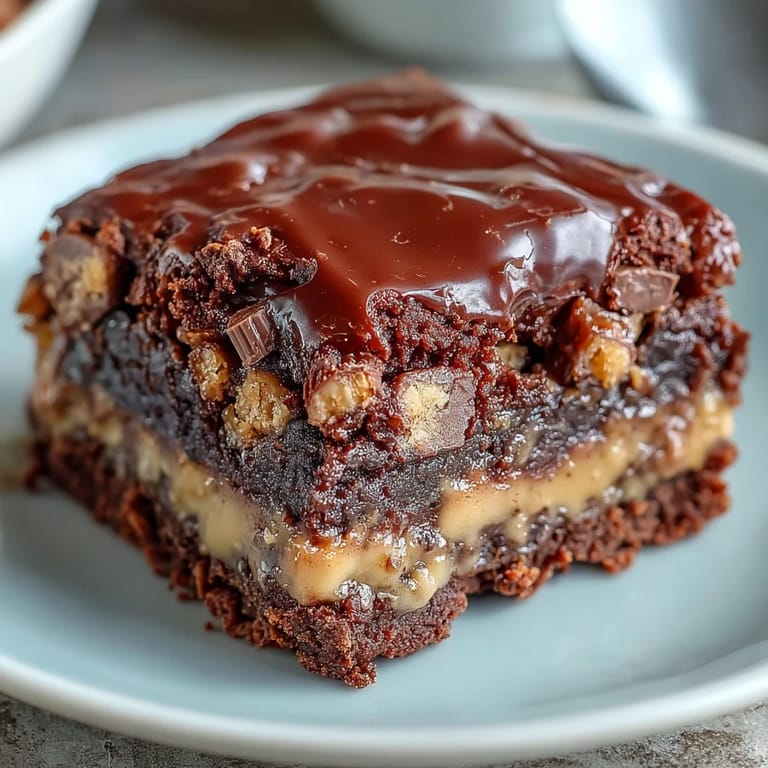
- Creamy peanut butter: Room temperature spreads easier and creates that irresistible gooey bottom layer everyone fights over
- Unsalted butter melted: Salted works too but you might want to reduce the peanut butter slightly to balance flavors
- Whole milk: Makes the cake incredibly moist though you can use whatever milk you have on hand
- Mini peanut butter cups: The mini size distributes perfectly throughout so every bite has peanut butter chocolate goodness
- Semi sweet chocolate chips: Adds little pockets of extra chocolate that melt into the most delicious puddles
Tired of Takeout? 🥡
Get 10 meals you can make faster than delivery arrives. Seriously.
One email. No spam. Unsubscribe anytime.
Instructions
- Preheat your oven and prepare the pan:
- Get your oven to 350F and grease a 9x13 baking dish well because that peanut butter layer will stick if you dont
- Create the peanut butter foundation:
- Spread the room temperature peanut butter in an even layer across the bottom of your dish
- Make the batter:
- Whisk together the cake mix melted butter and milk until mostly smooth dont worry about tiny lumps
- Layer it up:
- Pour the chocolate batter over the peanut butter layer and spread gently to cover
- Add the chocolate peanut butter magic:
- Scatter those mini peanut butter cups and chocolate chips all over the top
- Bake until perfect:
- Bake for 35 to 40 minutes until a toothpick comes out with just a few moist crumbs attached
- The hardest part waiting:
- Let it cool for at least 15 minutes though cutting it warm is half the fun
 Save
Save This recipe has become my go to for every occasion because it never fails to make people happy. My neighbor actually asked if I could teach her teenage son how to make it because he loved it so much at our last gathering. Theres something about the combination of flavors that just feels like comfort in cake form.
Making It Your Own
Ive learned that the base recipe is incredibly forgiving and welcomes all sorts of delicious variations. Sometimes I swap in chunky peanut butter for extra texture or add a handful of crushed pretzels on top for that salty sweet combination that nobody can resist.
Serving Suggestions
While this cake is absolutely perfect on its own warm from the oven, a scoop of good vanilla ice cream takes it over the top. My sister in law likes to drizzle hers with a little warm chocolate sauce but honestly that might be overkill for some people.
Storage and Make Ahead Tips
This cake actually tastes even better the next day when the flavors have had time to meld together. I keep leftovers covered at room temperature for a couple days or in the refrigerator if it lasts longer than that though it never does at my house.
- You can assemble everything up to a day ahead and store it covered in the refrigerator before baking
- Add a couple minutes to the baking time if baking cold from the refrigerator
- Wrap individual slices in plastic and freeze for up to three months
 Save
Save This is the kind of dessert that brings people together and creates the kind of memories that last long after the last crumb is gone. Enjoy every gooey chocolatey bite.
Recipe Guide
- → Can I use natural peanut butter instead of creamy?
Natural peanut butter can work but may result in a slightly different texture. Creamy peanut butter spreads more evenly and creates a smoother layer. If using natural, make sure it's well stirred and at room temperature for easier spreading.
- → How do I know when it's done baking?
The cake is done when it's set and a toothpick inserted into the center comes out mostly clean with a few moist crumbs. This usually takes 35–40 minutes at 350°F. The top should be slightly firm but still gooey from the melted candy cups.
- → Can I make this ahead of time?
Yes, you can assemble it ahead and refrigerate before baking, though you may need to add a few minutes to the baking time if it's cold. Once baked, it keeps well covered at room temperature for 2 days or refrigerated for up to 5 days. Warm leftovers in the microwave for that fresh-baked gooey texture.
- → What can I substitute for the devil's food cake mix?
Any chocolate cake mix will work, including milk chocolate or dark chocolate varieties. For a homemade version, you can use your favorite chocolate cake recipe that yields a similar amount of batter. Just keep in mind that the texture may vary slightly.
- → Can I freeze this dessert?
Yes, this freezes well! Let it cool completely, then wrap tightly in plastic wrap and foil. Freeze for up to 3 months. Thaw overnight at room temperature or warm individual servings in the microwave. The texture remains surprisingly good after freezing.
- → Why is it called a dump cake?
Traditional dump cakes get their name from the method of "dumping" ingredients into a pan without mixing. While this version requires a bit more preparation, it retains the spirit of easy, minimal-effort baking with maximum indulgence.